Bought my first house!

In January 2022, my partner and I bought our first house. The process was far from smooth—our solicitors needed constant chasing, and I even had to handle some of their tasks, like contacting the bank myself! After months of worrying about our mortgage offer expiring or the seller backing out, we finally got the keys on July 18th, six months after starting the process.
The State of the House
The house needed a lot of work: a new bath and shower, tiling, carpet, stripping all the wallpaper, new skirting boards—the list goes on. We decided to focus on finishing the upstairs first so we could move in quickly, then tackle the downstairs while living there. I’m writing this as we begin the ground floor renovation.
Before Any Work
Below are some videos showing what the property looked like before we started:
Getting the house to a livable state felt like climbing a mountain! Our first jobs were:
- Swapping out the locks
- Moving all our belongings into the cellar
- Stripping out the old pine cupboards
Despite only living in a single bedroom at my partner’s house, we somehow managed to fill the entire cellar with our stuff!
Stripping Back
Once the cupboards were gone, we stripped the wallpaper and ripped out the carpet. This revealed walls that needed patching before painting. We used a mix of plaster and filler to smooth out the holes.
Here’s what the room looked like after painting the ceiling white and stripping everything back:
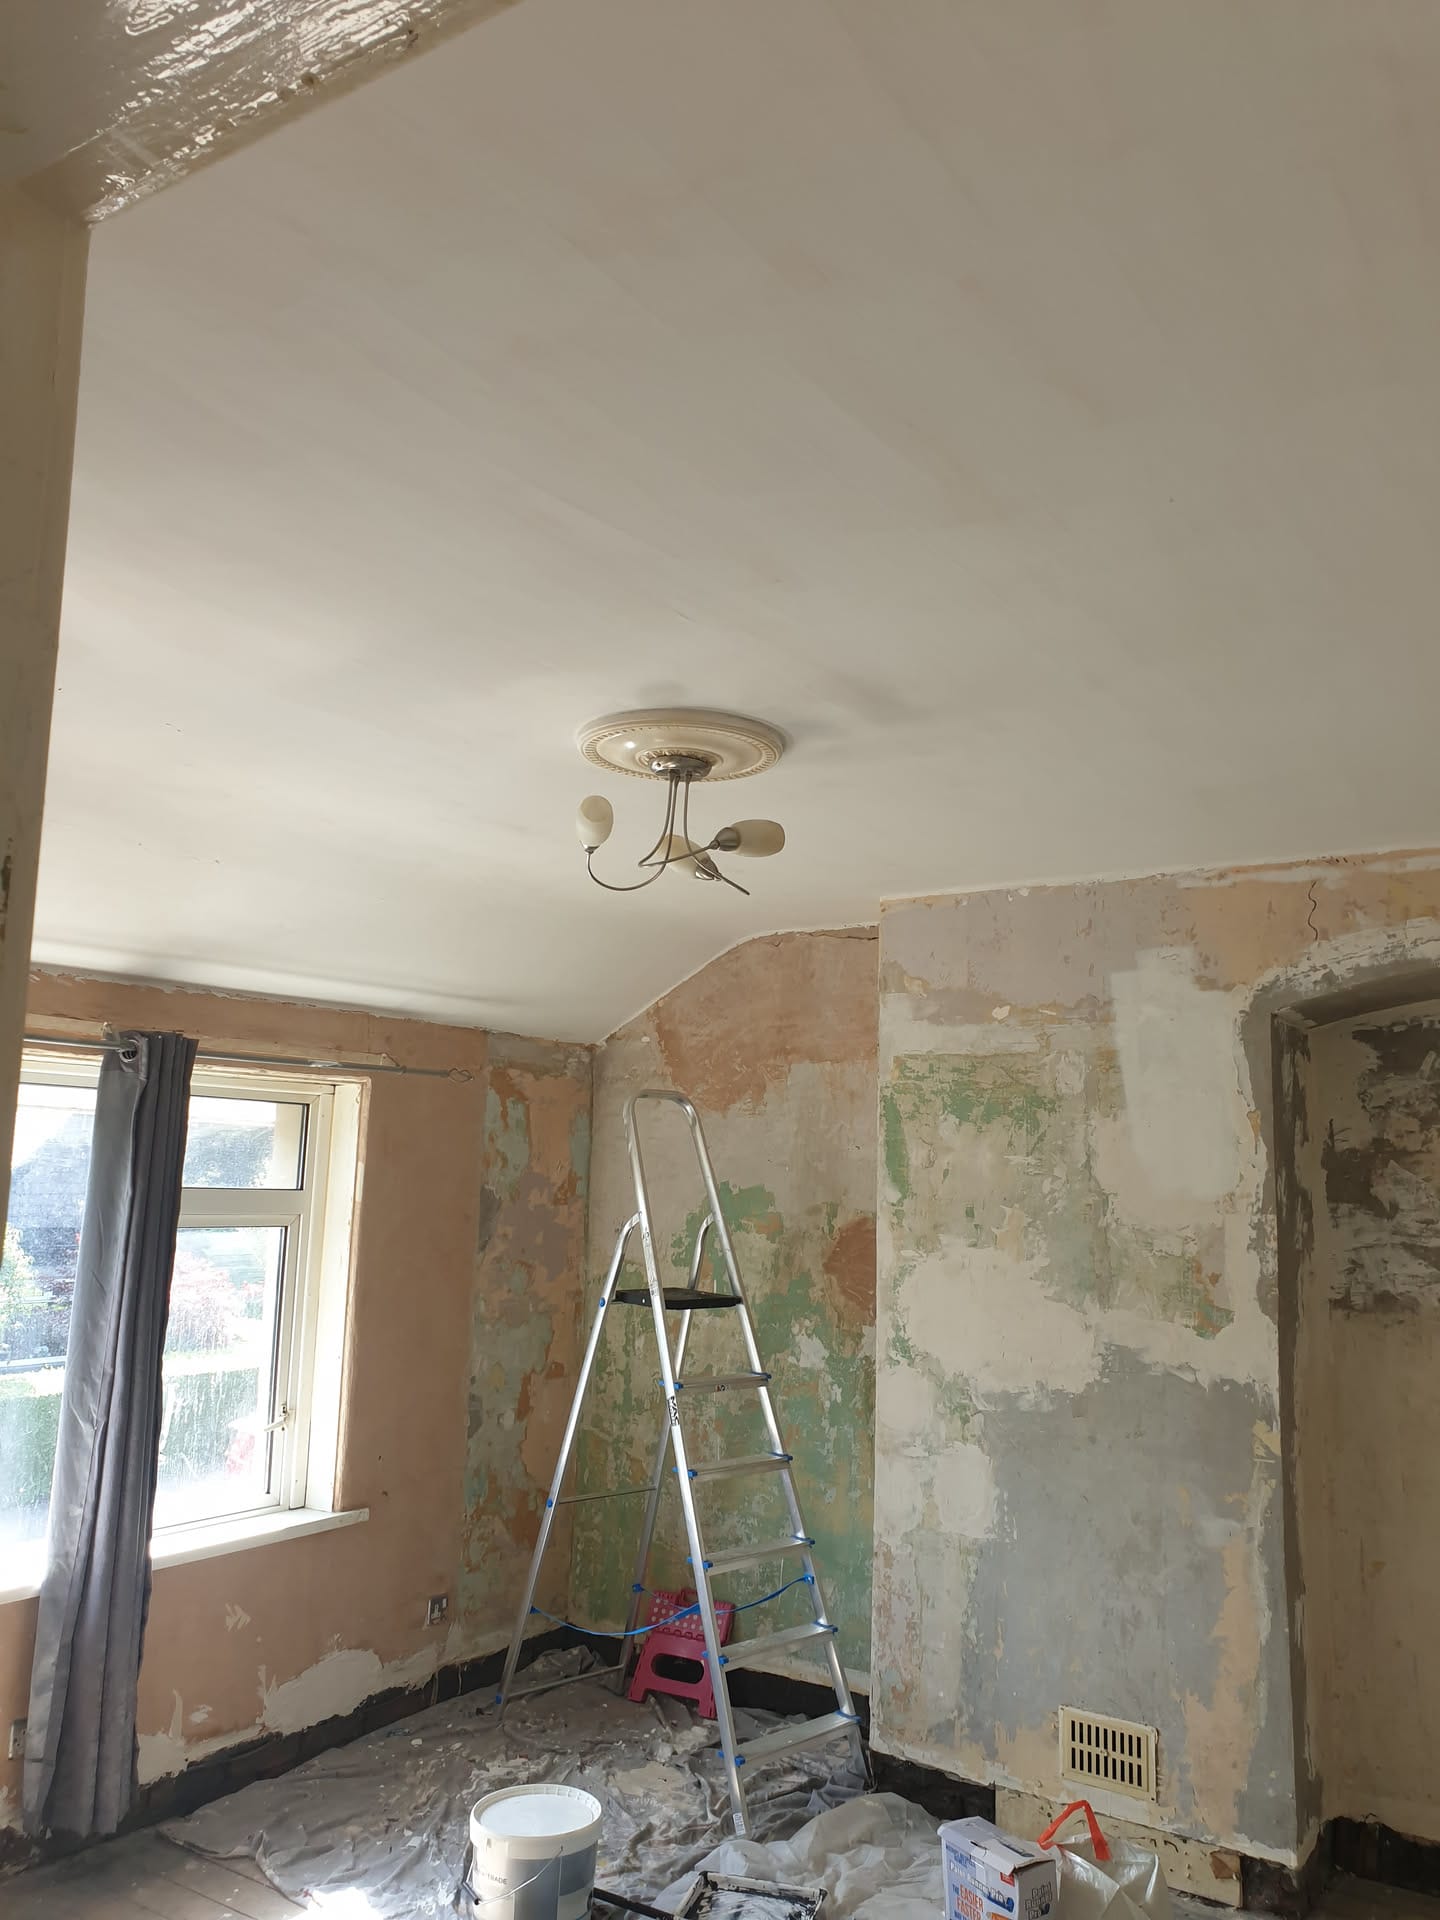
This made the room feel much bigger and brighter!
Installing Skirting Boards
Next, we installed new skirting boards. The previous tenants hadn’t plastered behind the old boards, leaving a huge gap. This made fitting the new boards tricky, as they didn’t feel solid. I plastered the gap to create a firm surface for the grab adhesive. Most of my knowledge came from YouTube, Reddit, and advice from family and friends—so there was a lot of trial and error! The skirting was the most frustrating part, especially getting the corners right. Here’s the result after finishing the skirting:
With the skirting done, we could finally get the carpet installed. Here’s what it looked like with the new carpet and finished walls:
Tackling the Bathroom
The next big job was the bathroom, which meant learning some plumbing! We wanted to remove the old corner Jacuzzi bath and electric shower. According to my partner, living with one of those was out of the question!
To make way for the new bath, I had to install some new tiles:
As you can see, the tiles don’t fully match. That’s because we plan to fully renovate the bathroom in the future, so we didn’t want to go overboard now. I also installed stop valves for each pipe. Once the bath arrived, I started plumbing it in. I was dreading this step, but it turned out to be the easiest! I made the waste pipe slope down gradually by building a mini ramp from wood we’d removed from the bedroom. Here’s what it looked like:
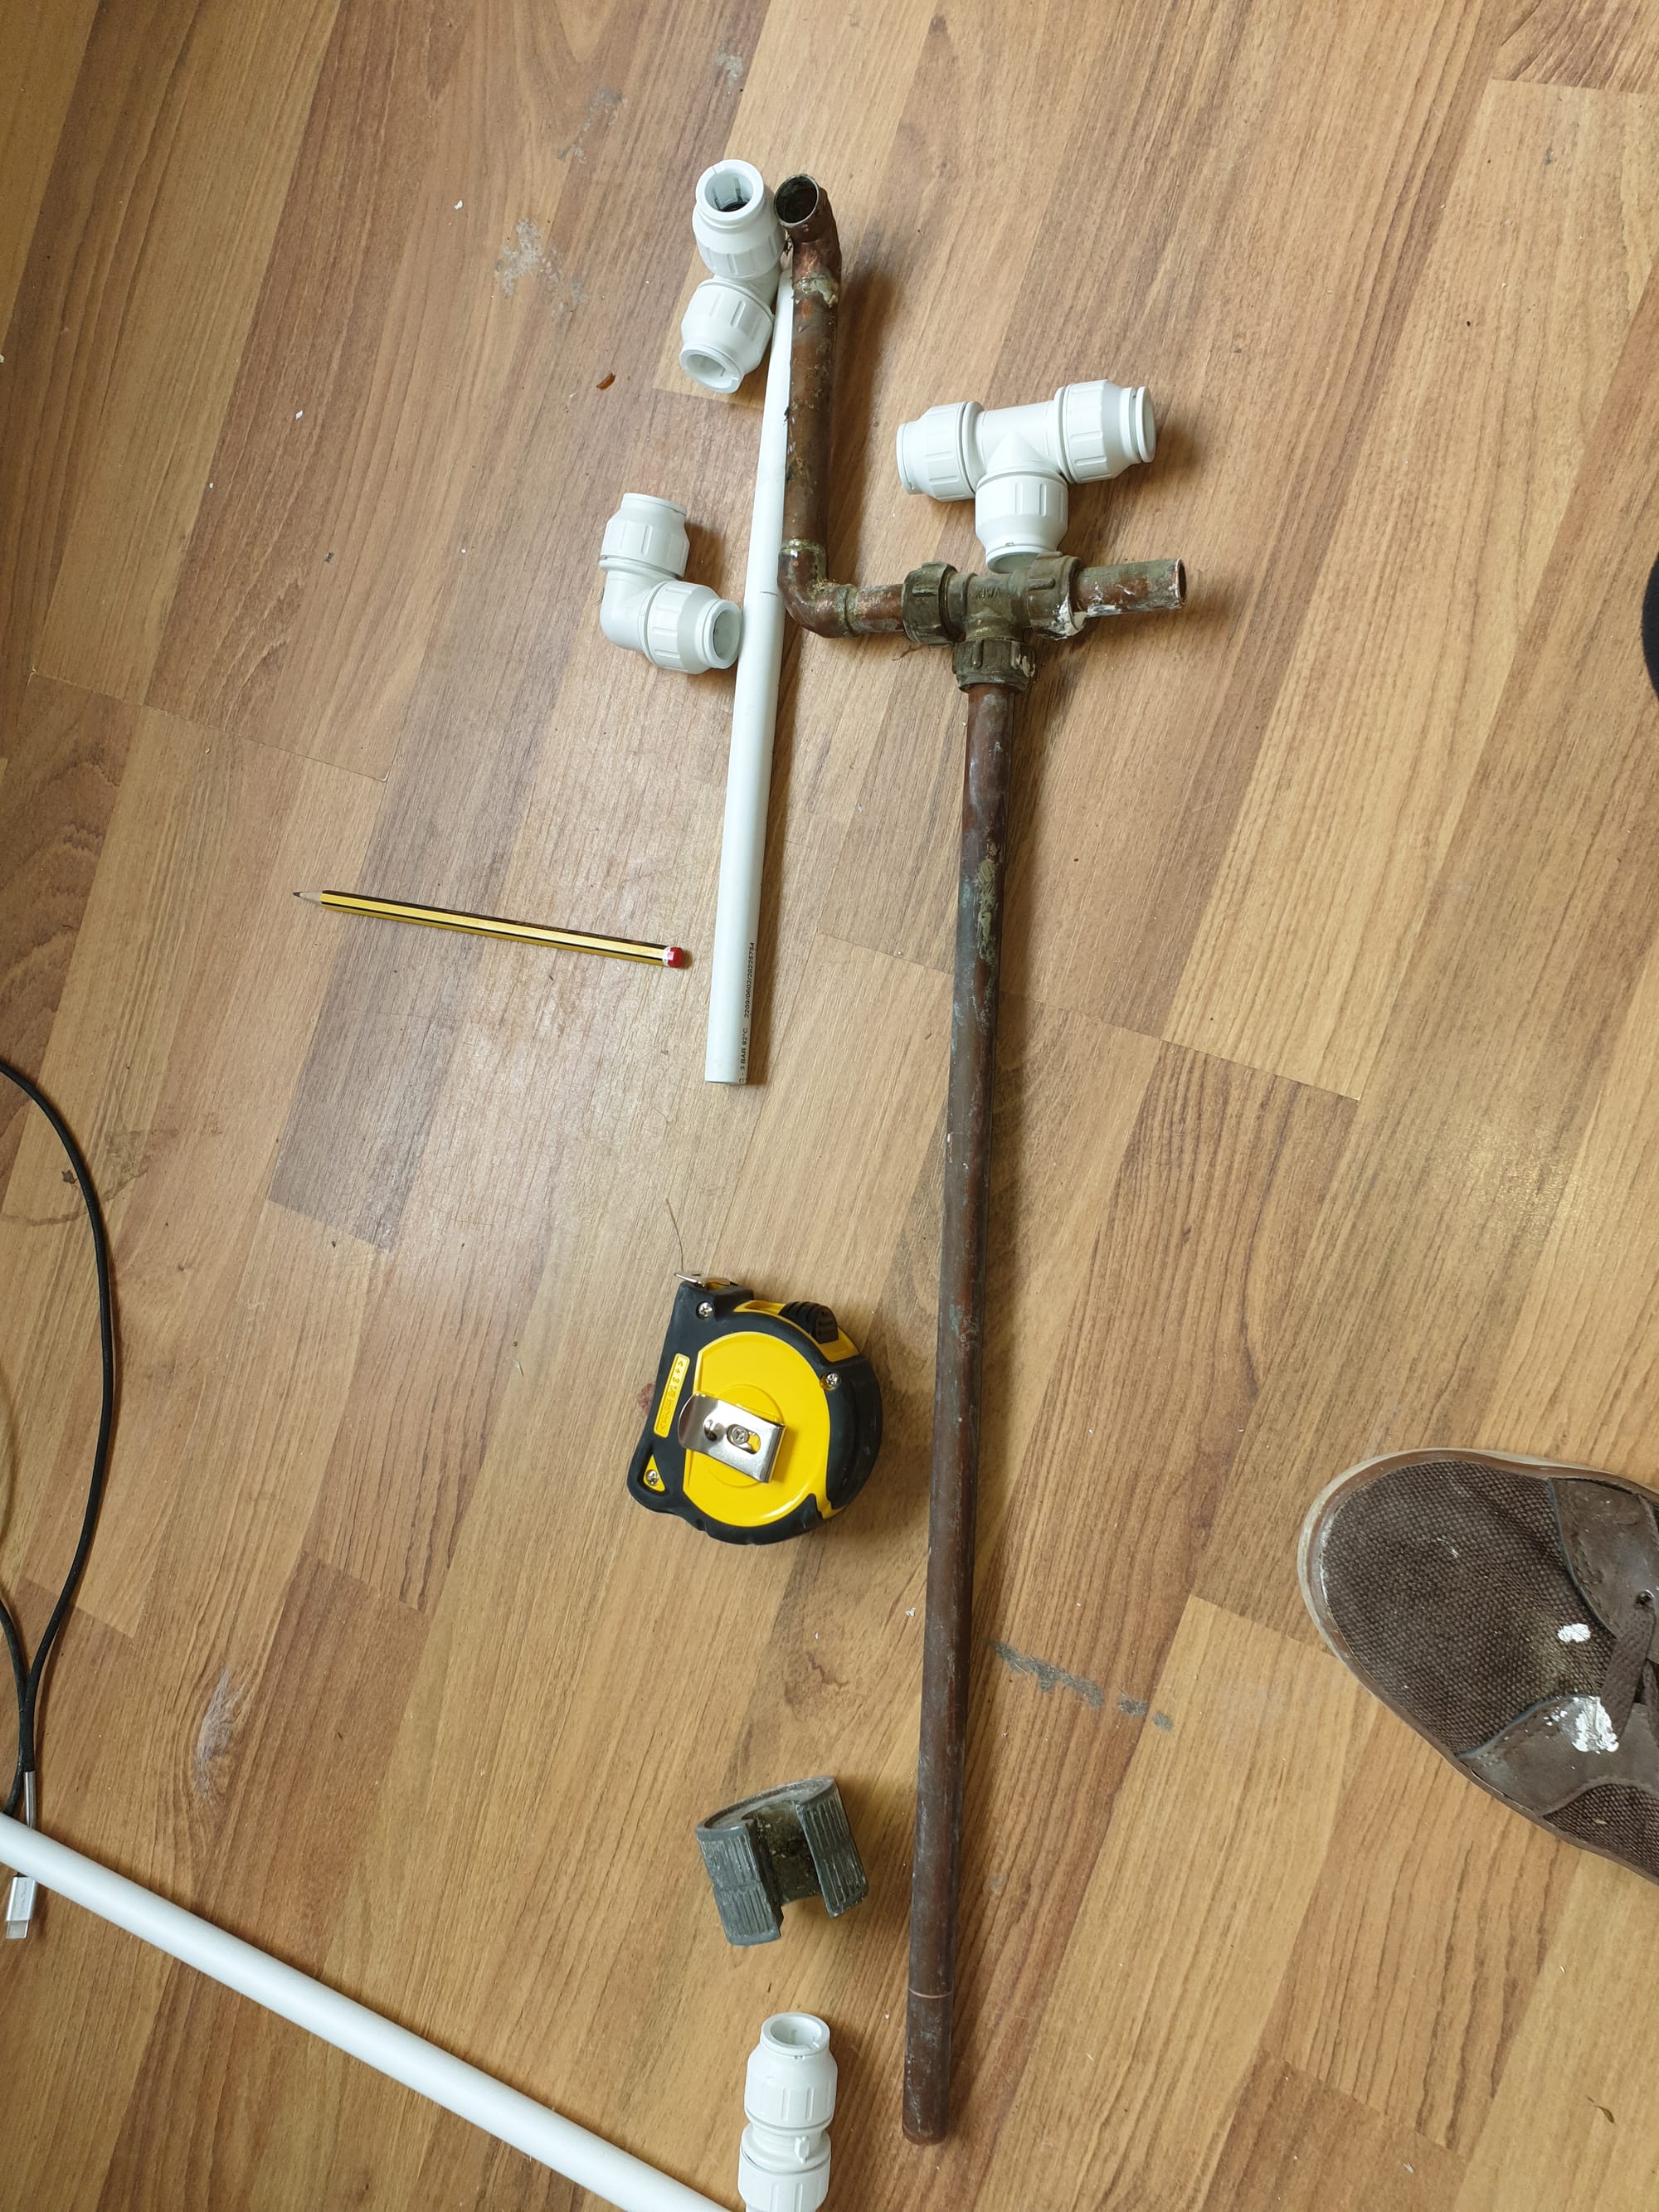
Everything was going well—no leaks!—until I found water under the cabinet. The original copper pipe my plastic contraption was attached to had come loose. Of all the things I thought might leak, the professional’s pipe was last on my list! Fixing it was a nightmare, as I had to access it from underneath the kitchen.
I replaced it with my own handiwork. Plastic push-fit connectors are the world’s best invention—they snap into both plastic and copper pipes and require no extra work. It’s basically Lego!
A bit of tiling, grouting, flooring, and paint later, we finally had a leak-free bathroom! Ignore the hanging racks (I plan to swap them out—suction cups aren’t great), and don’t mention the bath panels; they’re still on the to-do list!
Reflections
I really enjoyed the process of renovating the bathroom. It was satisfying to see everything come together, despite the hiccups along the way. Now that we can take a hot bath and a shower, it’s time to start working on the downstairs!